Fluorescent light fittings to LED
Changing fluorescent light fittings to LED can easily be done in just a few minutes. Remember though that you are dealing with potentially dangerous voltages, so it's best to drop the mains-breaker.
This blog is part of a general series on going-green; in short using less energy in the home, and in particular through harnessing the power from the sun.
Light-emitting diode lamps use much less electricity than the old conventional incandescent globes and fluorescents.
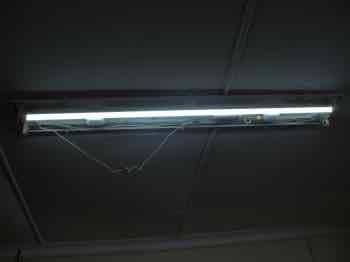
This page was last updated by Bernard Preston on 5th June, 2021.
Why would you want to do this in any case? Firstly a LED-tube draws less than half the current of a conventional appliance. And you don't need a starter, or a ballast; they require a lot of energy when turning the device on, and tend to burn out eventually too, and must be replaced. The light emitting diodes are much simpler.
If you are putting up a new light-fitting, then the holder is much cheaper, and the LED tubes too; and they will last a lot longer. Ours are now four-years old and working without a hitch.
The new LED tubes come in at least two-types:
- Those which in appearance look exactly like the old fluorescent-tubes; they are relatively cheap.
- Those which consist of a series of tiny LEDs, and are quite expensive.
The wiring for the two types is different, as you will read.
Then there's no dangerous mercury-vapour in the LED tube; if you accidentally break the fluorescent kind, you could serious poison yourself and the environment.
This applies to the CFLs too; compact fluorescent-lamps. Avoid them.
Type 1
Type 1 are those being favoured from 2019 onwards, costing around $3; in appearance they look exactly like the old fluorescent-tubes. Important to note is that only the pins on the side with the writing are active; those at the other end are only to hold the tube in place.
Step 1.
Remove the starter and any other capacitors that existed in the old-types of fluorescent fittings; discard them. Of importance, make this the inactive end. Snip off the wires; they will carry no current.
Step 2.
At the other end, there will be two-leads; connect one directly to the live and the other to the neutral.
You are done; nothing could be simpler.
Type 2
This is the older basic wiring diagram and, as you can see, it's a little more complicated; frankly you are probably unlikely to find these now. This is for a two-tube holder.
The two-wires that come out of the left socket both go to either live or neutral, and the those from the right go to the other. LED fittings will work off either 110V or 220V.
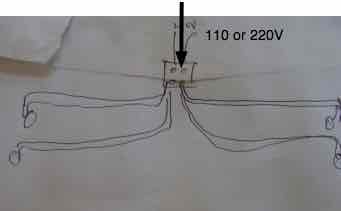
But inside the existing old flurorescent tube holder there will be a mass of wires; never fear, this is ridiculously simple.
Fluorescent light fittings to LED
Changing fluorescent light fittings to LED can be done in five minutes.
- Flick down the mains-breaker.
- Get a wooden ladder and remove firstly the diffuser, if there is one, and then the old existing fluorescent-tube. There is probably a starter; discard it.
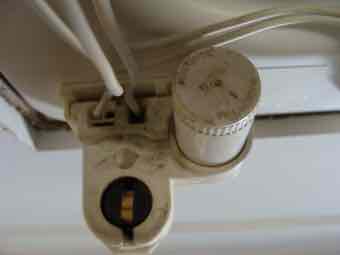
Here it is sans the starter. Newer fluorescent fittings do not have one. This is a very old, 35 years, so it is grubby but still easily switched to LED; the plastic may be fragile.
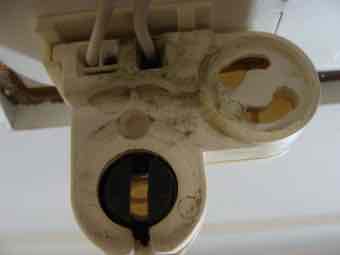
Double tubes
Look around for the ballast; it's a rectangular-box, about 10cm long. If you are using a double tube holder there will be two. You have to remove both completely and discard them.
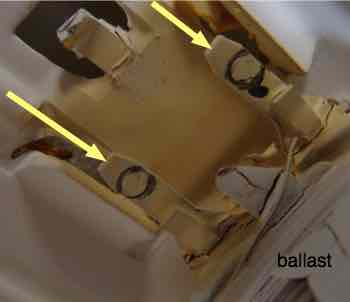
Identify the ballast, and the two-wires running into it, where the yellow arrows are seen below. There will be some sort of connector; these have black circles drawn on them for reasons known to the manufacturer only. Unscrew or unplug them.
If it proves difficult as it did on one of my conversions, just snip them off with a pair of side-cutters close to the connectors.
Stay with me because changing fluorescent light fittings to LED really is ridiculously simple.
Cut a short length of single-core wire, say 5 to 10 mm long and strip off the covering from each end. It can be very thin as these LED tubes draw only 18 watts. Roughly one tenth of an amp on 220 volts mains, double that if you are in America and on 110 V.
That's one of the savings of light-emitting diode lamps; all the wiring is much thinner as the current is so low.
The principle is the same; both wires from one side of the connector go to the live, and those from the other go to the neutral.
So in this case there will be four-filaments to the live and four to the neutral.
This connector attaching the wiring to the ballast is very old and started falling apart when I undid the screws; never mind, it's still functional.
Simply connect the one end of your length of wire into the right-side, and the other into the left. Make sure the screws are tight and there's no possibility of a loose filament of copper touching the chassis.
And Bob's your uncle, you are done. Tidy up the wires; as you can see in the first-photo they may be hanging loose.
Replace the diffuser if there is one, flick on the mains, then the switch and, hey presto, let there be LED light.
One small problem
It is possible that you may have to remove the connector at the end where the ballast was; carefully prise it loose watching for bits of copper that may spring out.
Carefully bend the copper-filament that goes to the ballast in such a way that it makes firm contact with the filament leaving the holder. It is made of springy material, so it should not be a problem.
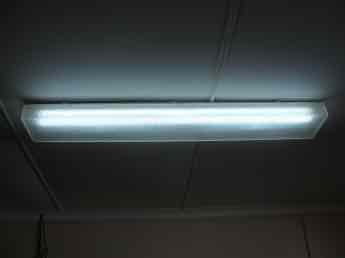
These LED tubes made up of many little diodes are expensive; around $40. Manufacturers claim they will last 50,000 hours but I'm skeptical.
My oldest fittings are now ten-years old and I am less skeptical. That's about 30,000 hours. If you get mains surges periodically it may blow the electronics in the LED fittings. We have an inverter connected to our solar generator, and it produces a very pure sine wave with almost no voltage fluctuation, reducing the problem.
Ours still work perfectly, but I would today rather use type 1 which are much cheaper.
None of our LED-tubes have blown yet; they seem to have better protection that the ordinary bulbs.
Do remember that whilst converting fluorescent light fittings to LED isn't rocket science, electricity does kill if you do silly things. These days with earth-leakage protectors, you'll just get a jolt. I always turn off the mains when working with electricity; a qualified electrician would not do that, but he is a professional, and we are just hackers, right?
Now for the rest of your light-bulbs. LED globes come with all the different fittings today, whether ES screw or bayonet.
When you buy LED light bulbs you'll find it is quite routine. They do cost more, but last much longer, and use a fraction of the power. Make sure you choose the right intensity; cool, warm or bright.
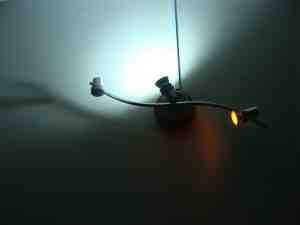
Bright has a lot of lumens. 3 - 9 watts is usually adequate for inside the house.
10 - 20W for outside floodlights.
Solar power energy
Solar power energy comes for free but, mindful of the cost of harvesting and storing it, it's important to change over to energy saving devices like LED lights and, below, an induction-stove.
Having half a dozen ordinary lamps on all evening will drain the average battery-pack, so make sure you learn how to change conventional fluorescent light fittings to LED.
The next step
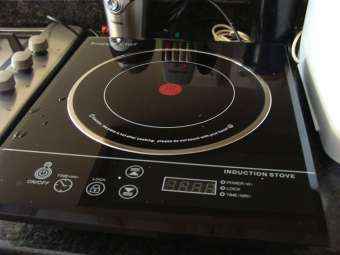
Whether you desire to reduce your electrical consumption because you've become a greenie, or you simply want a lower utility bill, the next step after changing your incandescent and fluorescent light fittings to LED, is to buy an induction stove.
These little induction cooktop stoves are magic; they take up a small amount of room next to your regular hob. They use less than half the power of a conventional-plate, and work at twice the speed. In fact they are significantly faster than gas.
By using the bottom of your pot as the element, you have instant heat. I've seen them from $30 - 100. Worth every cent, if only for the convenience of their speed. But they do not work with copper or aluminium-bottomed pots.
Today they come with gas in a single-hob; starting a new home that is definitely what I would use.
Gas for when the weather is inclement and the batteries low; induction if there is ample-power, plenty of sunshine, all in one hob.
The material expressed on this page is gleaned from the nutritional and environmental literature; it is clearly referenced. A plain distinction is made between the author's opinion and that which is scientifically proven. When in doubt consult your health professional.
To suggest a correction or clarification, write to Dr Bernard Preston here. Contact.
Newsletter
Our newsletter is entitled "create a cyan zone" at your home, preserving both yourself and Mother Earth for future generations; and the family too, of course. We promise not to spam you with daily emails promoting various products. You may get an occasional nudge to buy one of my books.
Here are the back issues.
- Lifestyle and ideal body weight
- What are ultra-processed foods?
- Investing in long-term health
- Diseases from plastic exposure
- Intensive lifestyle management for obesity has limited value
- A world largely devoid of Parkinson's Disease
- The impact of friendly bacteria in the tum on the prevention of cancer
- There's a hole in the bucket
- Everyone is talking about weight loss drugs
- Pull the sweet tooth
- If you suffer from heartburn plant a susu
- Refined maize meal and stunting
- Should agriculture and industry get priority for water and electricity?
- Nature is calling
- Mill your own flour
- Bake your own sourdough bread
- Microplastics from our water
- Alternative types of water storage
- Wear your clothes out
- Comfort foods
- Create a bee-friendly environment
- Go to bed slightly hungry
- Keep bees
- Blue zone folk are religious
- Reduce plastic waste
- Family is important
- What can go in compost?
- Grow broad beans for longevity
- Harvest and store sunshine
- Blue zone exercise
- Harvest and store your rainwater
- Create a cyan zone at your home
Bernard Preston
Bernard Preston is not an electrician but had to work out how to change fluorescent light fittings to LED to reduce the load on his solar-generator; but in fact we should all do this next time an old tube blows.
You could do it too; fluorescent light fittings to LED is not rocket-science.
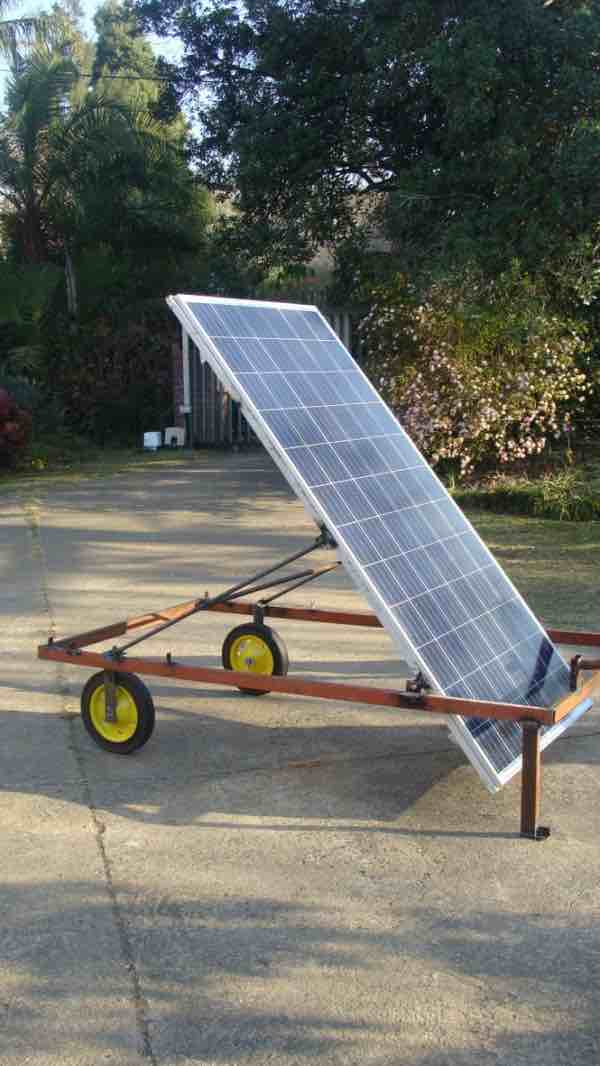
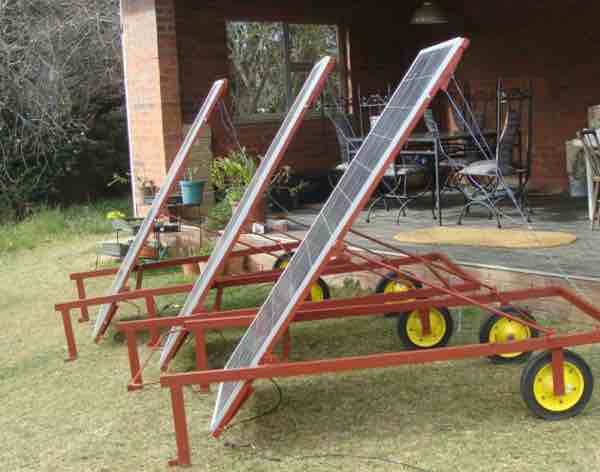
A new product is in development; watch this space. Just one of these mobile solar panels and one 12V lithium battery will run your LED light fittings all night, but I recommend you go for at least three so you can power your computer too.
If you really only want lights, then with one or two panels you would only need a much less expensive LED MPPT:
- 300W panel ± R3,000
- 10A LED MPPT ± R1,000
- Home made cart ± R500
- One or two lithium batteries of choice; they aren't cheap.
This however is not what I recommend; you will want to grow it, which can't readily be done, but it would run your lights and a laptop, or a water-pump. Go big from the beginning if you can afford it.
Mark I above had a fairly serious drawback; see the shadows cast on the
panels by the transverse bar and handles? I have moved them both.
It is so light that you can turn it several times a day to keep facing the sun.
Useful links
When browsing use right click and "Open Link in New Tab" or you may get a bad gateway signal.
Bernard Preston books
I blog this website really for the fun of sharing the joys of being a greenie, and the power of spinal-adjustments coupled with exercises and wholesome meals. If you find these pages interesting, then you are sure to enjoy one of my books.
Have you read my latest trilogy? Only $1.14 each. Hold onto your hat. Find A Family Affair by Bernard Preston at Amazon.
Did you find this page interesting? How about forwarding it to a friendly book or food junkie? Better still, a social media tick would help.
Address:
56 Groenekloof Rd,
Hilton, KZN
South Africa
Website:
https://www.bernard-preston.com